Adding an Authorized User
Students should create an authorized payer/user to grant a parent or other individual the ability to submit payments on their behalf.
Payer Invitation
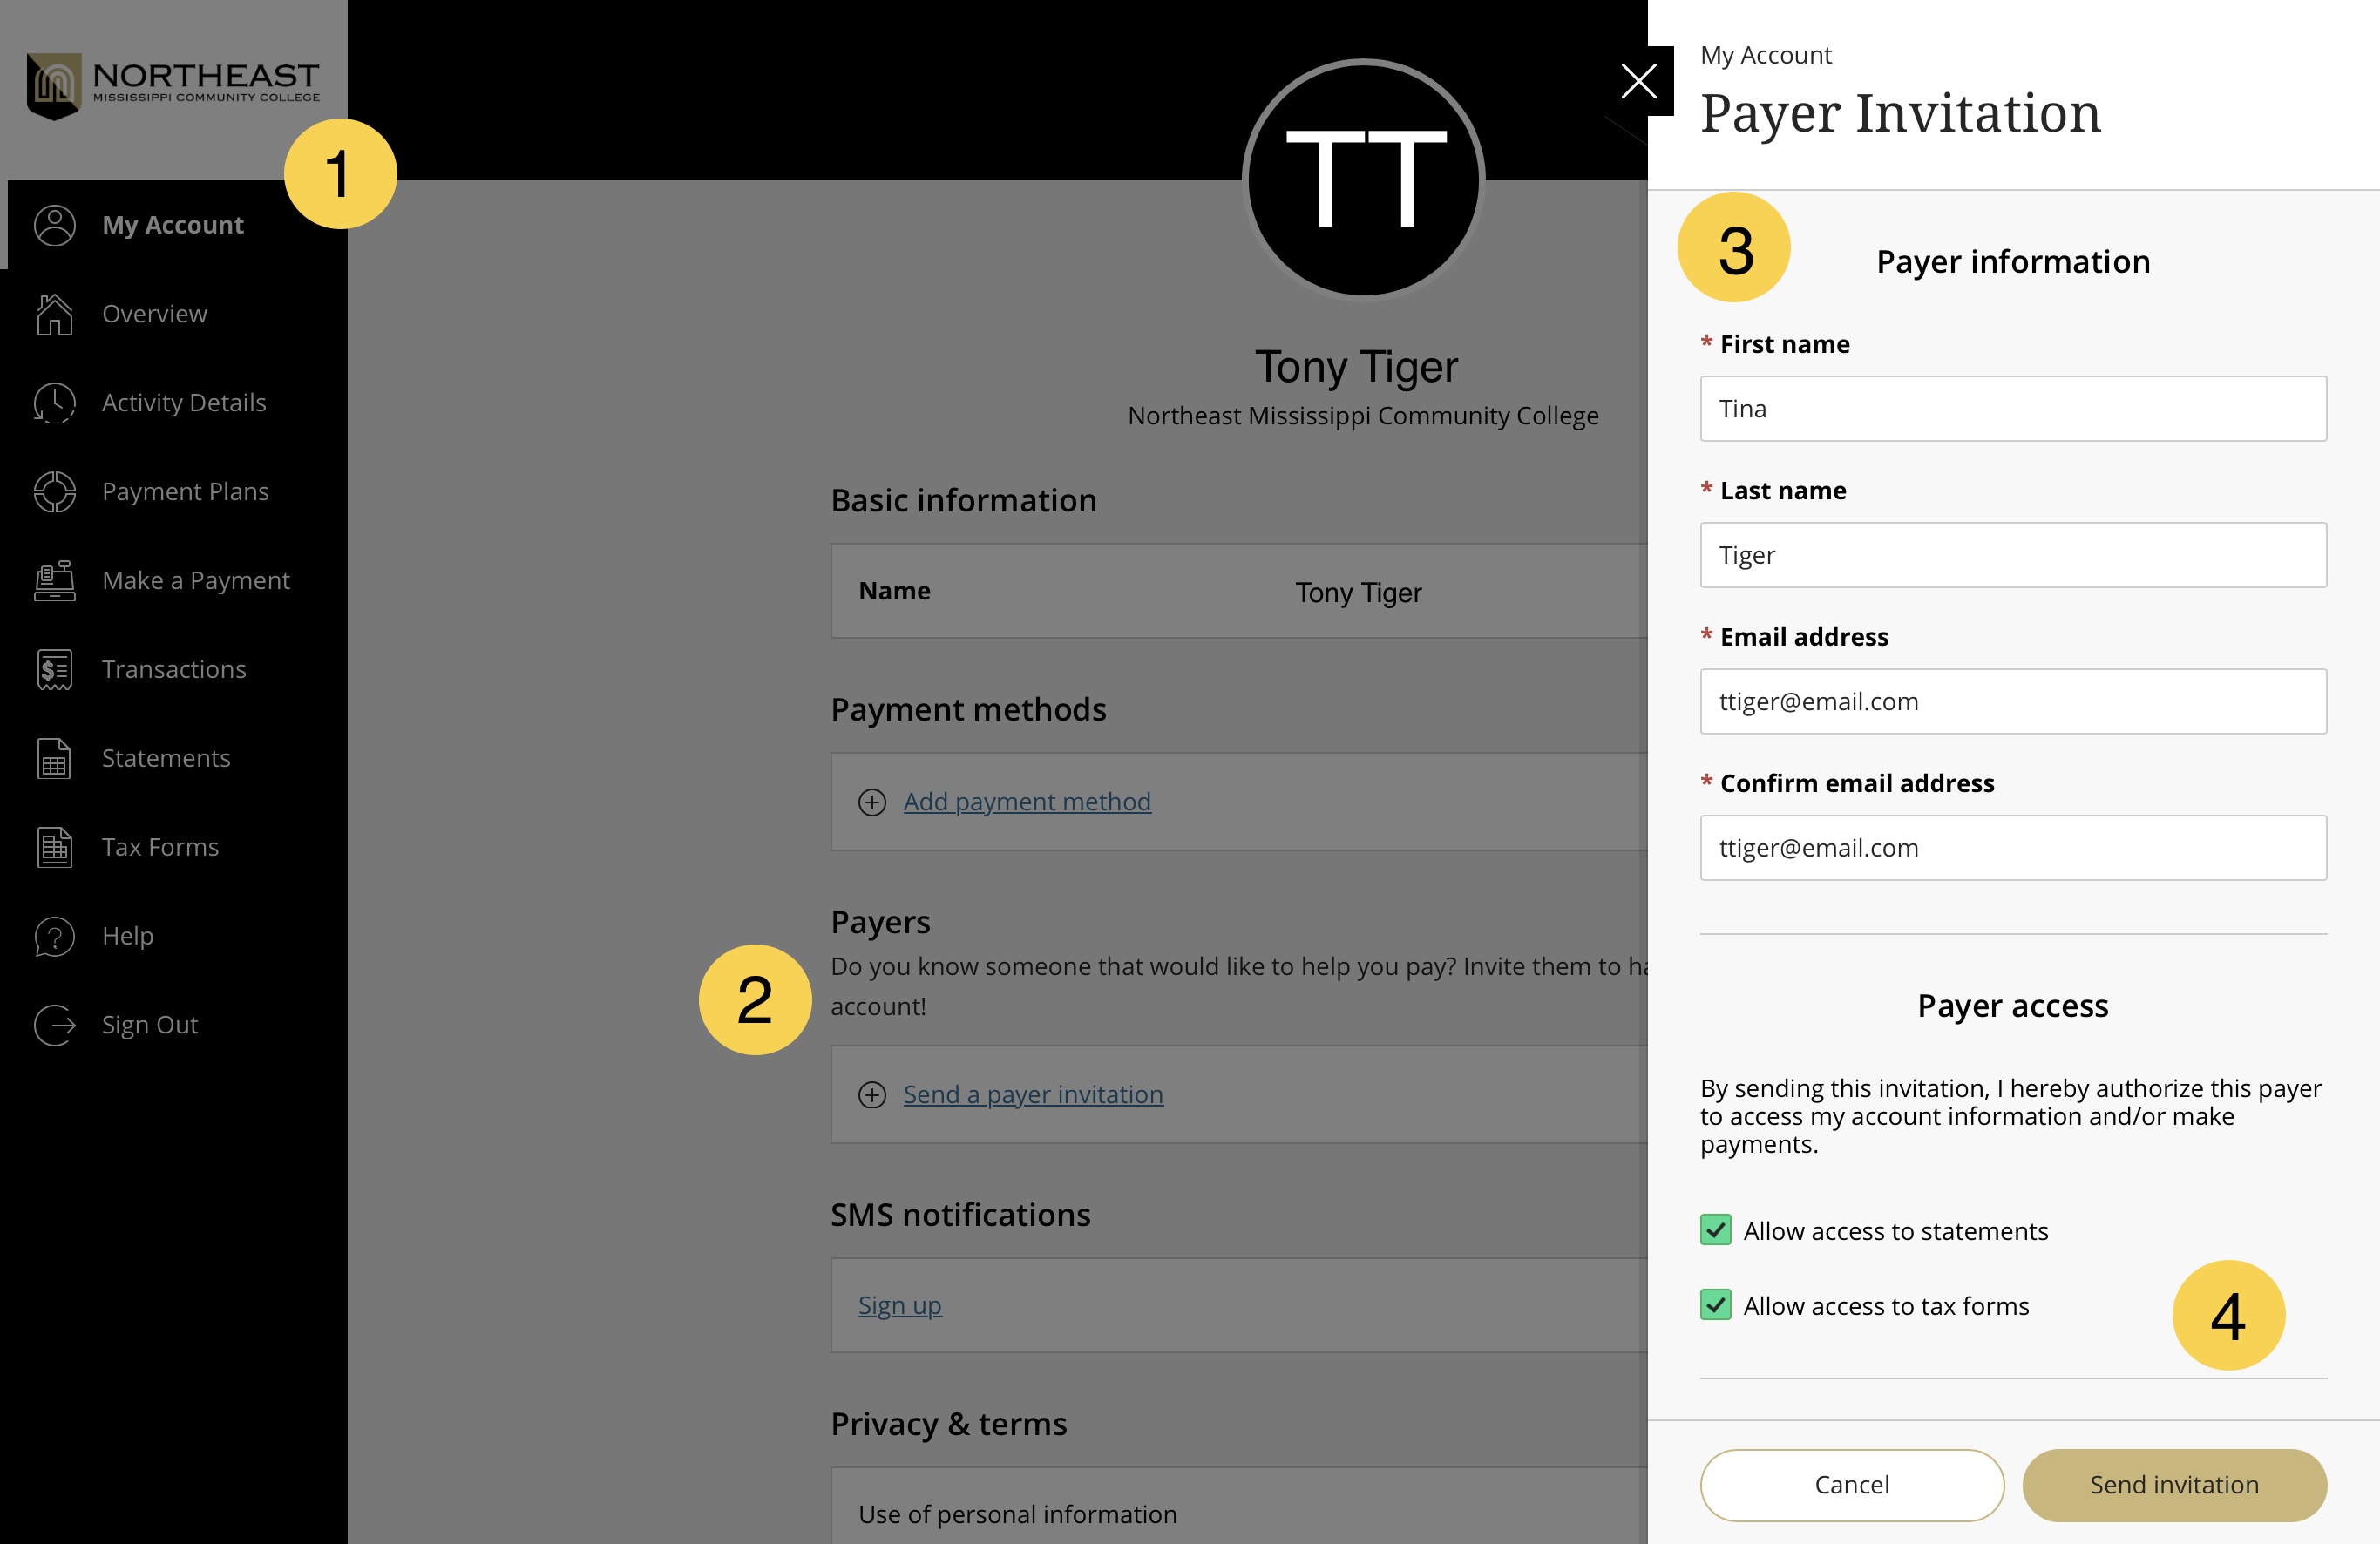
To create an authorized payer, sign in to your student account and follow the steps below.
- Click or tap My Account.
- Click or tap the Send a payer invitation under the Payers sections.
- Enter the Payer's first name, last name, and email address in the Payer information window.
- After confirming what access you want them to have, click or tap Send Invitation
The payer you entered will receive an email with instructions on activating their account and will then be able to log in and submit payments and, if allowed, view statements and tax forms.

